20、确认“模拟压力”选项前没有打勾,点确定按钮进行描边。
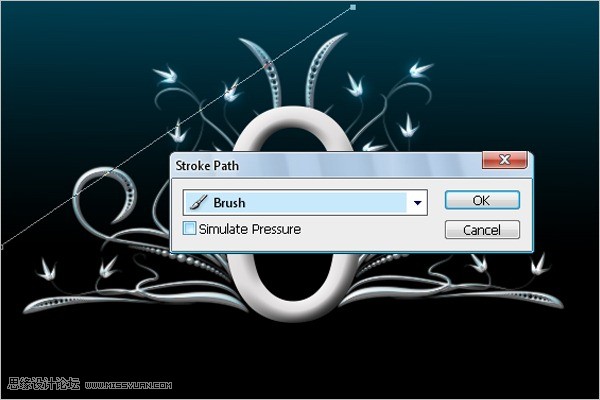
效果如图

21、使用移动工具,按Alt键,对上面图层进行拖拉,复制出相应的光柱,并合并这些光柱图层。
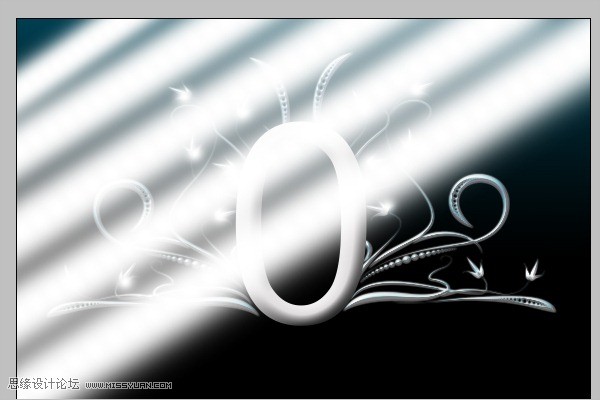
22、将光柱图层混合模式更改为柔光。

23、对光柱图层应用滤镜/模糊/高斯模糊,数量为76像素。

手机版,更便捷!
时间:2017-01-05 浏览次数: 编辑:9upk
20、确认“模拟压力”选项前没有打勾,点确定按钮进行描边。
效果如图
21、使用移动工具,按Alt键,对上面图层进行拖拉,复制出相应的光柱,并合并这些光柱图层。
22、将光柱图层混合模式更改为柔光。
23、对光柱图层应用滤镜/模糊/高斯模糊,数量为76像素。
标签: Photoshop
上一篇:Photoshop教程 如何用Photoshop调出室下一篇:怎么用Photoshop制作简单的放射光晕图